Web dev basics - css (part-1)

Basic Selectors
* selects every single element in our page. A general style people use in this is the following to remove the default styling browser adds.
 * {
             box-sizing: border-box;
             margin: 0;
             padding: 0;
 }
We will learn about the box-sizing property later.
Type Selector: If we only wanna select certain tags on the page, example - we want to select all the paragraph tags and make the font color red.
 p{
     color: red;
 }
Class selector: We can add a class attribute to as many html tags as we want, we use dot and the class name in CSS to style the html.
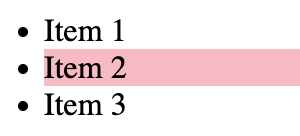
 <head>
     <style>
         .pink{
             background-color: pink;
         }
     </style>
 </head>
 <body>
     <ul>
         <li>Item 1</li>
         <li class="pink">Item 2</li>
         <li>Item 3</li>
     </ul>
 </body>
Id selector : It’s exactly like class selector except we cannot have same class across multiple html elements, Id value is unique and can only be present in one html element. We use # for ids.
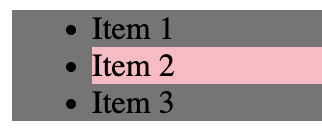
 <head>
     <style>
         .pink{
             background-color: pink;
         }

         #grey {
             background-color: grey;
         }
     </style>
 </head>
 <body>
     <ul id="grey">
         <li>Item 1</li>
         <li class="pink">Item 2</li>
         <li>Item 3</li>
     </ul>
 </body>
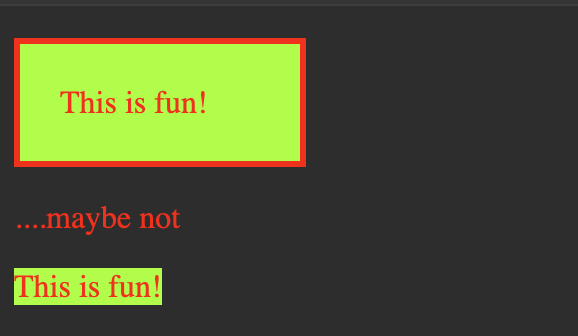
Combining Selector (AND): Suppose we only want to add CSS only to elements which have multiple classes. For example if we have class A and B, to add styling to only elements that have both Class A and B we keep adding them without space.
 <head>
     <style>
         body{
             background: #333;
         }
         .red{
             color: red;
         }
         .green{
             width: 100px;
             background-color: greenyellow;
         }
         p.red.green {
             padding: 20px;
             border: red 3px solid;
         }
     </style>
 </head>
 <body>
     <p class="red green">This is fun!</p>
     <p class="red">....maybe not</p>
     <span class="red green">This is fun!</span>
 </body>
As you can see in the image, only paragraphs that have both red and green styles have the added padding and border.
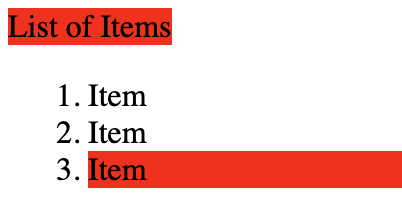
Combining Selectors (OR): To select multiple tags that should have the same CSS style we use commas.
 <head>
     <style>
         span,li.red {
             background-color: red;
         }
     </style>
 </head>
 <body>
     <span>List of Items</span>
     <ol>
         <li>Item</li>
         <li>Item</li>
         <li class="red">Item</li>
     </ol>
 </body>
In this example we added the red background to both the span and list Item that also has a class of red.
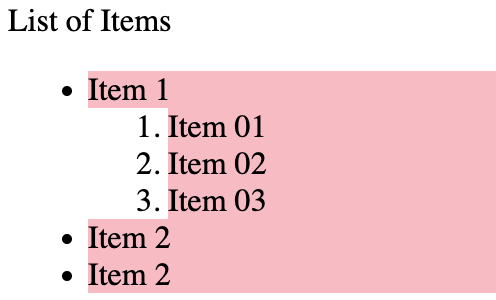
element inside element selector : To select all the specified elements inside the element be it a direct child, child inside child whatever. Just use space between the elements.
 <head>
     <style>
         ul li{
             background: pink;
         }
     </style>
 </head>
 <body>
     <span>List of Items</span>
     <ul>
         <li>Item 1</li>
             <ol>
                 <li>Item 01</li>
                 <li>Item 02</li>
                 <li>Item 03</li>
             </ol>
         <li>Item 2</li>
         <li>Item 2</li>
     </ul>
 </body>
Here we are selecting ALL the li tags inside the ul and changing background color to pink.
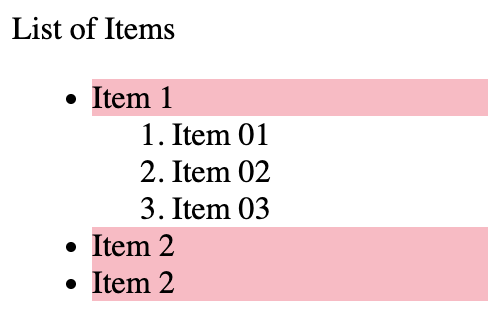
direct child selector : As the name implies it only selects the direct children of the element. Use the > symbol.
 <head>
     <style>
         ul > li{
             background: pink;
         }
     </style>
 </head>
 <body>
     <span>List of Items</span>
     <ul>
         <li>Item 1</li>
             <ol>
                 <li>Item 01</li>
                 <li>Item 02</li>
                 <li>Item 03</li>
             </ol>
         <li>Item 2</li>
         <li>Item 2</li>
     </ul>
 </body>
As you can see only the li elements directly inside ul are styled (direct children) not the ones inside ol.
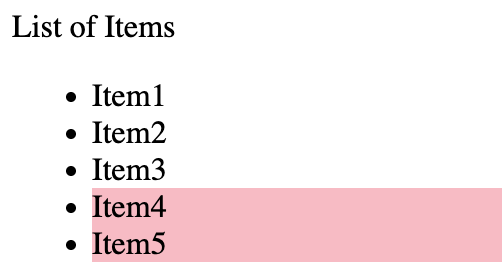
Sibling selector : Siblings in this context basically mean all elements in the same nesting in the HTML. The following selector only selects all the siblings after the specified element.
<head>
    <style>
        li.pink ~ li{
            background: pink;
        }
    </style>
</head>
<body>
    <span>List of Items</span>
    <ul>
        <li>Item1</li>
        <li>Item2</li>
        <li class="pink">Item3</li>
        <li>Item4</li>
        <li>Item5</li>
    </ul>
</body>
As you can see all list items after the one with class “pink” have a pink background applied.
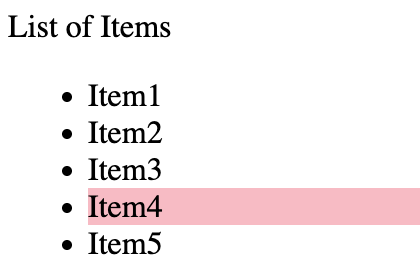
Now what if we only want to apply to 1 sibling, on the li right after li with “pink” class but not on any other sibling after that.
Note : This doesn’t check every li after it, it only checks the next sibling if it matches (in this case li) it applies the style.
li.pink + li{
  background: pink;
Pseudo Classes
Hover : It selects the element and applies style as soon as we hover with our mouse.
<head>
    <style>
        li:hover {
            background-color: pink;
        }
    </style>
</head>
<body>
    <span>List of Items</span>
    <ul>
        <li>Item1</li>
        <li>Item2</li>
        <li>Item3</li>
        <li>Item4</li>
        <li>Item5</li>
    </ul>
</body>
focus : As soon as you click on the element the styling is applied.

and as soon as it is clicked. brown background will unapply if clicked outside.

<head> <style> input:focus { background-color: brown; } </style> </head> <body> <label for="">Input Name :</label> <input type="text"> </ul> </body>- required : will only select elements that have the required attribute.
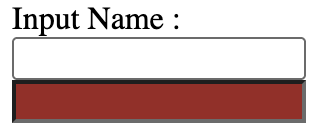
        <head>
            <style>
                input:required {
                    background-color: brown;
                }
            </style>
        </head>
        <body>
            <label for="">Input Name :</label>
            <br>
            <input type="text">
            <br>
            <input type="text" required>
            </ul>
        </body>
btw ‘required’ Prevents form submission if the field is empty. The browser will show a popup warning like "Please fill out this field."
checked : Similarly we can have ‘input:checked’ to apply style to checkboxes only if they get checked by the user.
disabled : similarly we have ‘input:disabled’, btw disabled attribute makes the input unclickable and greyed out. Crucially, disabled inputs are not sent to the server when the form is submitted.
Selecting Children
first-child : here we select the first child of of what ever mentioned, we do not search if the child is present if it, if what we specified doesn’t match with the first child we just don’t apply styling, we don’t go on searching for it among al the children.
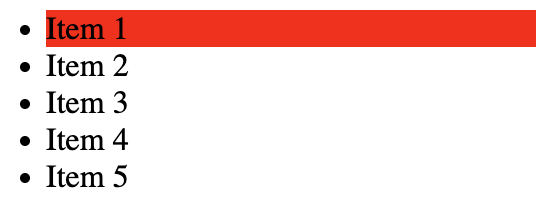
<head>
    <style>
        ul li:first-child{
            background-color: red;
        }
    </style>
</head>
<body>
    <ul>
        <li>Item 1</li>
        <li>Item 2</li>
        <li>Item 3</li>
        <li>Item 4</li>
        <li>Item 5</li>
    </ul>
</body>
last-child : selects the last child.
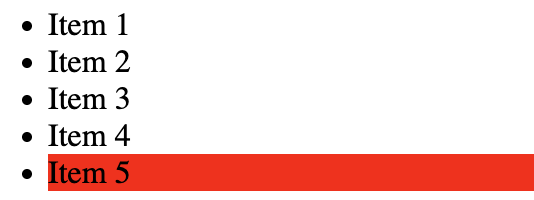
li:last-child{
    background-color: red;
}
nth-child : selects the specified child between first and last
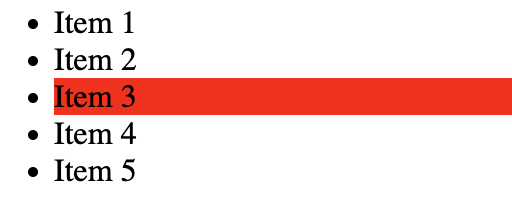
li:nth-child(3){
   background-color: red;
}
we can also pass a formula, say we wanna select all the even numbered Item.
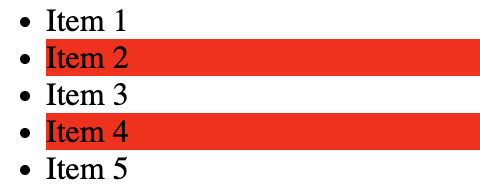
li:nth-child(2n){
   background-color: red;
}
3n : selects every third element
2n-1 : selects every odd element
nth-last-child : Thinks of last element as first and first as last, also the elements in between in reversed order.
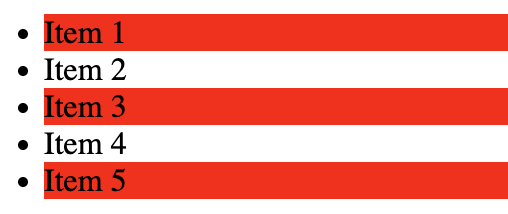
li:nth-last-child(2n-1){
   background-color: red;
}
only-child : select all Childs that are the only child of a parent element.
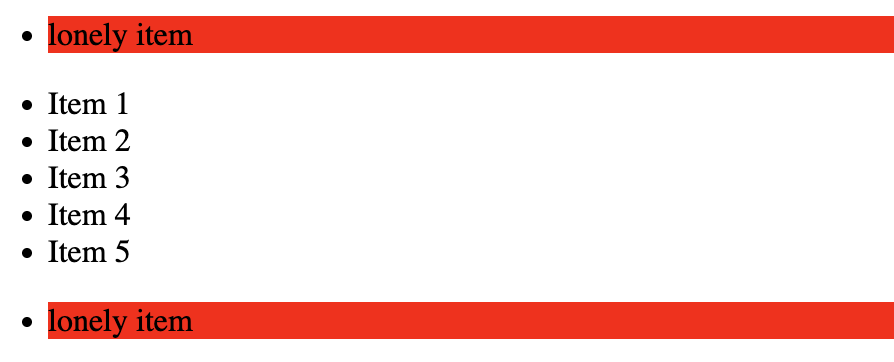
<head>
    <style>
        li:only-child{
            background-color: red;
        }
    </style>
</head>
<body>
    <ul>
        <li>lonely Item</li>
    </ul>
    <ul>
        <li>Item 1</li>
        <li>Item 2</li>
        <li>Item 3</li>
        <li>Item 4</li>
        <li>Item 5</li>
    </ul>
    <ul>
        <li>lonely Item</li>
    </ul>
</body>
first-of-type & last-of-type : selects the first or the last specified tag which is a child.
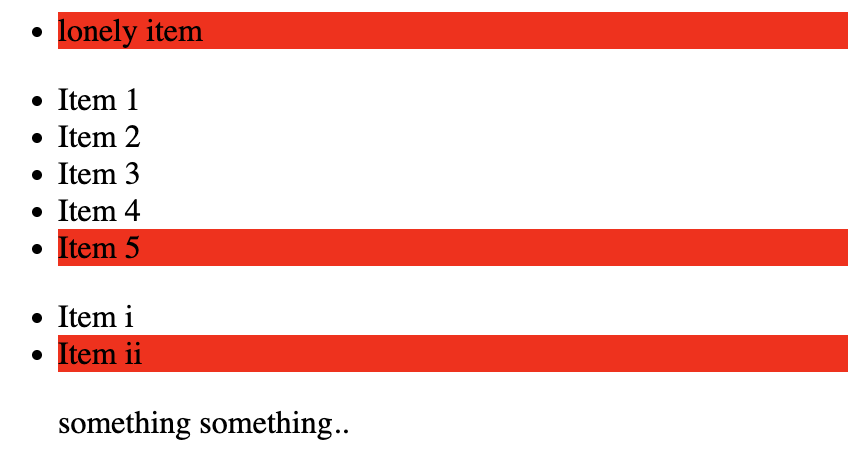
<head>
    <style>
        li:last-of-type{
            background-color: red;
        }
    </style>
</head>
<body>
    <ul>
        <li>lonely Item</li>
    </ul>
    <ul>
        <li>Item 1</li>
        <li>Item 2</li>
        <li>Item 3</li>
        <li>Item 4</li>
        <li>Item 5</li>
    </ul>
    <ul>
        <li>Item i</li>
        <li>Item ii</li>
        <p>somethng something..</p>
    </ul>
</body>
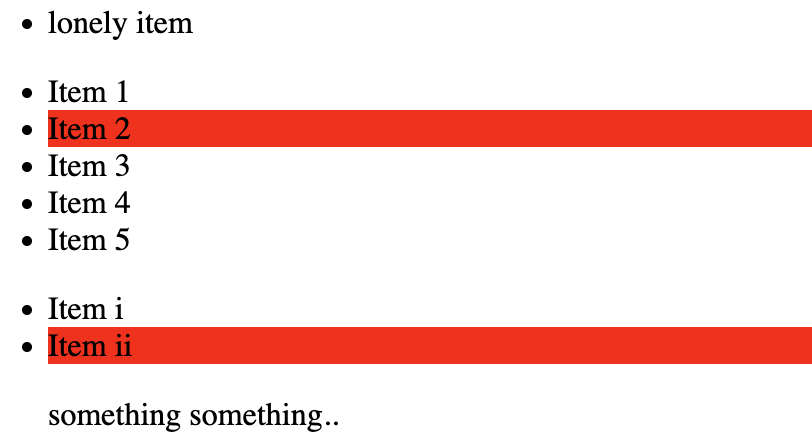
As you can see the p tag didn’t affect it, it will style the last possible li child even if the last child isn’t li.
Similarly first-of-type selects the first type of the li kind that is a child.
nth-of-type :
<head>
    <style>
        li:nth-of-type(2){
            background-color: red;
        }
    </style>
</head>
<body>
    <ul>
        <li>lonely Item</li>
    </ul>
    <ul>
        <li>Item 1</li>
        <li>Item 2</li>
        <li>Item 3</li>
        <li>Item 4</li>
        <li>Item 5</li>
    </ul>
    <ul>
        <li>Item i</li>
        <li>Item ii</li>
        <p>somethng something..</p>
    </ul>
</body>
similarly we also have nth-last-of-type which starts styling from the end.
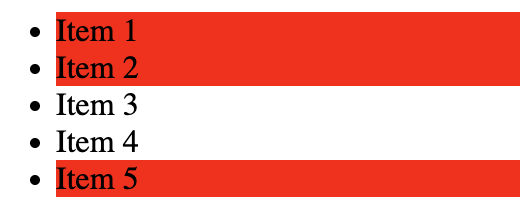
not() : we can tell CSS to style all the Childs that do not haven the following class.
<head>
    <style>
        li:not(.green){
            background-color: red;
        }
    </style>
</head>
<body>
    <ul>
        <li>Item 1</li>
        <li>Item 2</li>
        <li class="green">Item 3</li>
        <li class="green">Item 4</li>
        <li>Item 5</li>
    </ul>
</body>
Before & After Selectors
- before & after : adds content before or after a element.

                    <head>
                        <style>
                            div::before{
                                content: 'Before';
                                background-color: red;
                            }
                        </style>
                    </head>
                    <body>
                        <div>
                            This is a div
                        </div>
                    </body>
Attribute Selectors
using []

<head>
    <style>
        [data-red] {
            background: red;
        }
    </style>
</head>
<body>
    <div data-red="true">div 1</div>
    <div data-red>div 2</div>
</body>
Selects all divs with attribute ‘data-red’
<head>
    <style>
        [data-red="true"] {
            background: red;
        }
    </style>
</head>
<body>
    <div data-red="true">div 1</div>
    <div data-red>div 2</div>
</body>
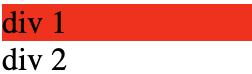
Selects elements with attribute data-red that have a value “true”.
<head>
    <style>
        [data-red^="12"] {
            background: red;
        }
    </style>
</head>
<body>
    <div data-red="423">div 1</div>
    <div data-red="true">div 2</div>
    <div data-red="123">div 3</div>
</body>
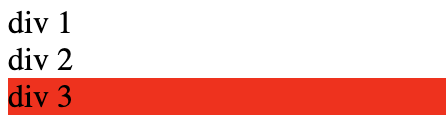
Selects all divs that have attribute ‘data-red’ and has the value that starts with 12…
[attr$="value"]— Ends with "value". If given data-red$=”23” it will change background for div 1 & 3.[attr*="value"]— Contains "value" anywhere.
That’s it for all the CSS selectors.


